PowerPoint Karaoke – Your Final Project
The most probable reason why you’re here is that your professor required you to create a Karaoke using PowerPoint. This is the usual final project when you are learning PowerPoint. I’m not sure if it’s the correct project but you need it so here’s how to do it!
I have to warn you though that creating karaoke using PowerPoint is a tedious process. You need the patience to succeed in creating a Karaoke PowerPoint that will boost your grade.
Steps in Creating a Karaoke Using PowerPoint
1. Choose and download a song from websites that offer instrumental versions. If your professor allows your music to have vocals, you can download an mp3 from other websites.
2. Open your Microsoft PowerPoint. I’m using PowerPoint 2010, yours might be a little bit different if you are using PowerPoint 2007.
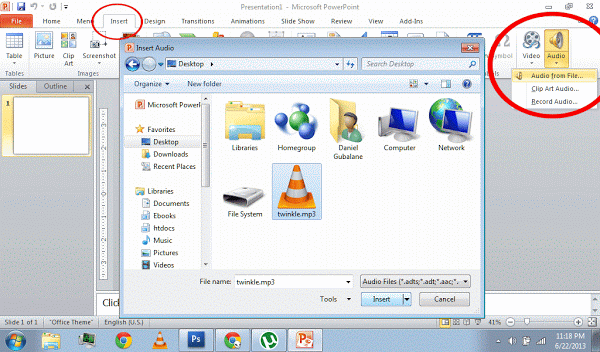
3. Click on Insert > Audio > Audio from File.
This will open a window where you choose your audio file or the music that you want. In order to ensure that your music will be played even when you transfer your karaoke powerpoint to another computer, put your mp3 and powerpoint file together in a single folder.
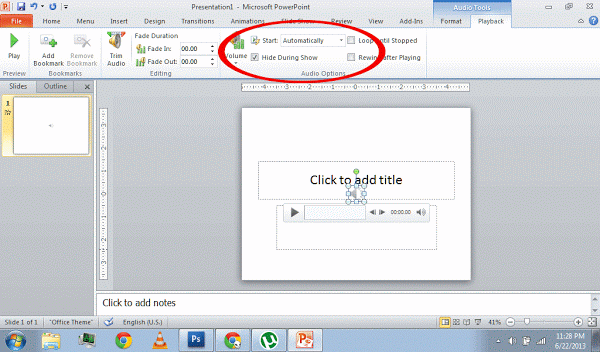
4. The Audio Tools tab will open automatically. Click on the Playback tab below it. Choose Automatically in the Start options. This will make the music start when you start your slideshow. Check the option Hide During Slideshow so that the speaker icon will not appear when you play your PowerPoint Karaoke.
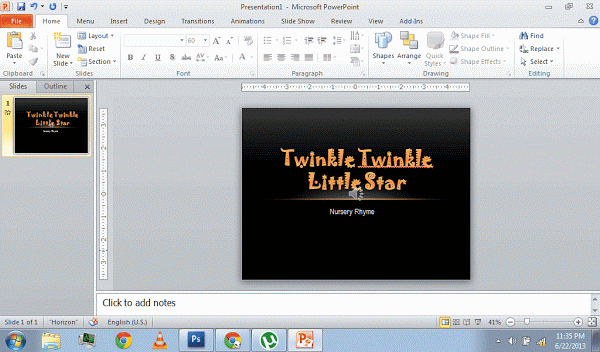
5. Edit the first Slide for the title of the song. Mine is Twinkle Twinkle Little Star and this is what I have. This will depend on your creativity and what you learned from your previous PowerPoint lessons.
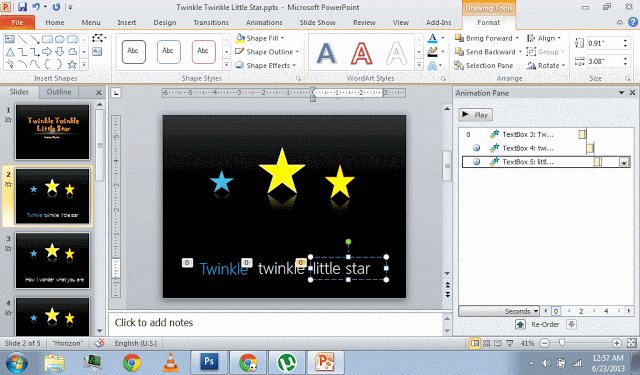
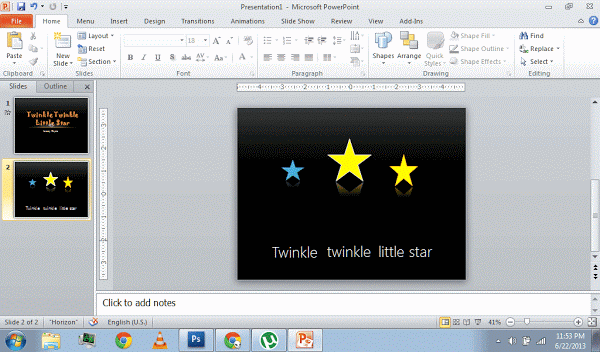
6. Add a new Slide and insert a text box. Write the first line in the lyrics of the song. Place each word on separate text boxes and make sure that they line up and have proper spacing. This is needed for the karaoke effect where the lyrics change in color.
Add a picture in the background to suit your song. You can also use pictures of beautiful beaches and other places.
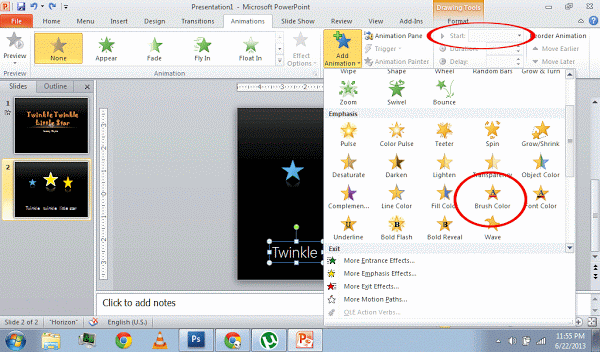
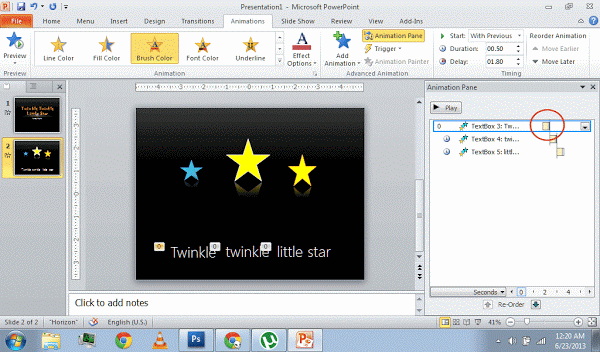
7. Select the text box containing the first word of the lyrics and apply an animation. We are now going to change its color. Click on Animations > Add Animation and scroll down to Emphasis Effects where you can find the Color Brush Effect. Choose it and Change the color to your desired one by Clicking on Effect Options.
Don’t forget to change the Start Option of the effect into After Previous. Do this for all the words in the slide.
8. Let’s now test your Karaoke made using PowerPoint. But before hitting F5, go back to the first slide and click on Transitions > Advance Slide. Uncheck the On Mouse Click option, tick the After option and increase it to 00:00:10.
9. If the lyrics are out of sync with the music. Click on Animations > Animation Pane and adjust the position of the orange rectangles after each effect. Keep testing until you get the correct positions of the effects. Change the Advance Slide option of each slide into After and leave it as 00:00:00.
10. Continue creating more slide for the rest of the song until you reach the end. Here’s my final product: A PowerPoint Karaoke Twinkle Twinkle Little Star!
The video was created by saving the Powerpoint file directly into WMV. It contains some errors like the color of the lyrics.
Tip: Choose songs that are not too long like Twinkle Twinkle.
If you have questions, don’t hesitate to ask me in the comments section below.
